Apple’s new operating system, OS X 10.10 “Yosemite”, was introduced at WWDC 14 on 2nd June 2014. The Developer Preview was available soon after the keynote and lots of people downloaded it right away. So did I. First, I installed Yosemite on an old MacBook Pro (Mid 2010) and after it seemed to be working and stable, I also installed it on my current working machine, a MacBook pro Retina Late 2013.
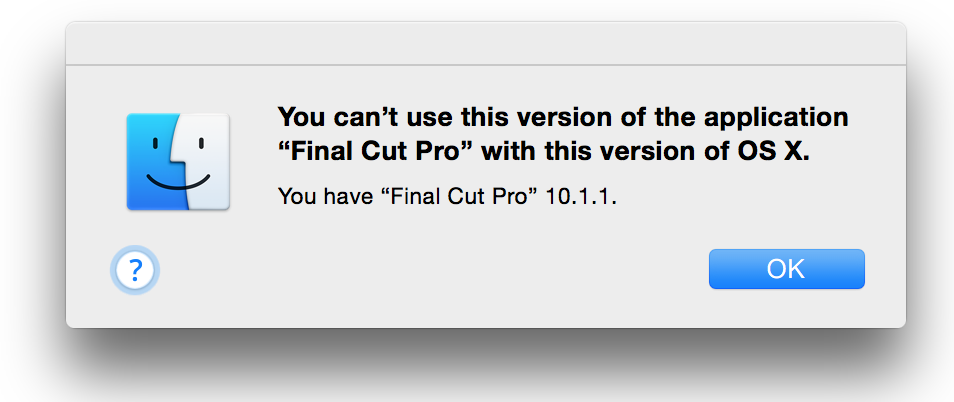
Yosemite’s Developer Preview seemed stable to me even though several features (e. g. Handoff, Dark Mode) does not seem to be available in the very first preview. The very next day, I wanted to edit and cut some movies using Final Cut Pro X. But:
Final Cut Pro X and iMovie won’t run on OS X Yosemite!
I found some people mentioning that topic and talking about how to fix it. But guess what… That’s bullshit! Okay, FCPX launches by starting it using the terminal, but it constantly crashes moments later.
The last few days, I spent some time searching the web for guides or howtos on “how to downgrade from a developer preview to the last stable OSX. Some hints just were to re-install a plain OS X, some guys mentioned to use Apple’s Recovery features or even to use the Disk Recovery Assistant.
[ad#Google Adsense 468×60 Image Inline]
I tried the following and none of those ways worked:
- I booted into OS X Recovery and tried to re-install but Yosemite was the only operating system I could install.
- I created a recovery USB-Stick using the Recovery Disk Assistant but the only recovery option was Yosemite.
- I used dd (command line tool) to overwrite the built-in recovery partition with the recovery data on the USB-Stick but that also contained Yosemite only.
- I tried to re-download OS X Mavericks or even (Mountain) Lion – none of them were able to re-install.
Then, I wanted to use Internet Recovery. A German website explains how to do this. But this guide is as sarcastic (“why the hell have been so eagerly and installed a developer preview”) as incorrect. It’s very obvious that the author has not tested his own guide or at least does not mention every possible case.
The problem is: once your Mac has a recovery partition (most Macs have), it always tries to recover from that partition. Even if you create an external recovery disk (e. g. on an USB stick), the currently installed version of OS X will be used for recovery. And as long as your Mac has a recovery partition, Internet Recovery won’t work. At least I found no ways to request recovery from Apple’s servers.
[ad#Google Adsense 468×60 Image Inline]
Here’s what I did to successfully downgrade from Yosemite Developer Preview to OS X Mavericks:
1. I made no backup of my data. If you want to follow this guide, I highly suggest to backup your data unless you don’t care.
2. I erased all data on the built-in recovery partition (as described here): use diskutil list to find the recovery partition, use diskutil eraseVolume HFS+ ErasedDisk /dev/DEVICE to erase all data on it
3. I restarted my Mac and jumped into recovery mode by pressing CMD-R while booting
4. I was taken into Internet Recovery
5. Internet Recovery asked for my Wi-Fi settings and I had to learn: keyboard language is set to US, keep that on mind if your Wi-Fi’s password containes “z” or “y” or even a special character
6. Internet Recovery began downloading the OS X version my Mac was originally shipped with and I had to learn: this takes several attempts, because I got the error “-501 0F” three times until it finally worked. The trick is: keep trying, keep repeating the procedure starting with step #3
7. Once OS X Mavericks’ installer files were downloaded (which took less than 5 minutes), the OS X Mavericks installation began
8. About 25 minutes later, I was able to boot into OS X Mavericks
9. I was happy to see that all my data was left untouched and even Safari fired up all my last tabs
The downgraded system feels like an updated OS. Spotlight is indexing things and Java wants to be re-installed. But I guess, that’s usual behaviour. After the next reboot, the system behaves quite normal. Except…
Two more things had to be repaired:
My usual account didn’t have administrative rights anymore. This behaviour is well known since the introduction of OS X Lion and I could manage to get rid of it following some steps explained on a webpage:
- I rebootet into Single User Mode by pressing CMD-S while rebooting
- I remounted the filesystem to be writeable: mount -uw /
- I removed a hidden “Setup is complete” file: rm /var/db/.AppleSetupDone
- I rebootet with reboot
- I clicked through the setup routine and set up a new admin account (test/test)
- I bootet into my system
- I gave my usual account those administrative rights back (using the newly created account)
- I deleted the new “test” account
The next thing was very annoying and is – I would say – a no-go for this downgrade procedure. Finder didn’t open any window anymore. While clicking the Finder icon, simply nothing happened. Nothing. Well, the application was running and the menu board showed all the options. But simply no window opened. I tried several things I’ve learned from various websites:
- Set desktop assignments using right-click on the icon. Didn’t help.
- Added a new user to see whether it’s a profile or system problem. The new user also had the same problem.
- I checked (and repaired) partition permissions using the Disk Utility. Didn’t help.
- I deleted Finder’s preferences (~/Library/Preferences/com.apple.finder.plist). Didn’t help.
- I deleted Finder’s application state (~/Library/Saved Application State/com.apple.finder.savedState). Didn’t help.
- I booted into Safe mode using pressing SHIFT while restarting. Same error occurred there.
- I tried to verify (and repair) the primary partition using the Disk Utility. Trying that, the Disk Utility informed me about some wrong things within the OS X installation and told me to re-install using the Recovery Disk
- I rebooted while pressing CMD-R to enter Recovery Mode once again.
- Since Mavericks was already successfully installed on my Mac, the recovery partition hold Mavericks again. So I was able to re-install OS X that way.
- Again about 45 minutes later, I booted into OS X 10.9 Mavericks and:
- Finder was working as expected again
As far as I can tell right now, the system totally behaves as expected. So saying: I successfully downgraded from OS X Yosemite Developer Preview to OS X Mavericks. If you want to follow my guide, please be careful and always be prepared for new problems.
Like if you like this posting.


One more tip: Please turn off FileVault before starting!
after downloading, I’ve to choose “install again” and to unlock the 10.10 volume. after that the installer told me, that this drive can’t be used as a startvolume…
any ideas how I can get fix this?
thanks
solved it. according to apple you’ve got to have FileVault2 on the Recovery Volume. after decrypting the internal drive with another excellent guide (http://derflounder.wordpress.com/2011/11/23/using-the-command-line-to-unlock-or-decrypt-your-filevault-2-encrypted-boot-drive/) Maverick installation with the internet recovery worked…
thank you for this article.
By far the most comprehensive and helpful guide on downgrading Yosemite. Thanks to Thomas!
All went well following this guide, and the guide posted by iRolf. Filevault caused a bit of a headache until i bothered to read the comments here, so i owe you a big thank you!
How to: Install Mavericks on MacBook Pro.
Please like my videos and subscribe to my Youtube channel for more interesting updates.
https://www.youtube.com/watch?v=0tF0TzARRII